

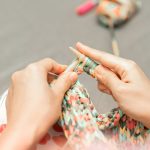
Slippery fabric is not difficult because it is delicate. It is difficult because it will not stay where you put it. Every technique that works on chiffon, charmeuse, georgette and fine lining tricot is really a way of temporarily removing that freedom of movement, then giving it back.
Cut single layer, and weight everything
Folding slippery fabric to cut two layers at once guarantees that the lower layer has shifted by the time the shears reach the end of the piece. Cut single layer instead. Flip the pattern for the mirrored piece and accept that this takes twice as long, because recutting takes longer still.
Pins distort fine fabric and leave holes in tightly woven silks. Use pattern weights, which can be anything heavy and flat, and a rotary cutter with a genuinely new blade. A rotary cutter is the correct tool here for the same reason it suits quilting: the fabric is never lifted, so it cannot shift as the cut is made. A dull blade pushes the fabric ahead of it rather than cutting, which is exactly the failure mode you are trying to avoid.
Covering the cutting table with a cotton sheet or flannel helps. The texture grips the fabric and stops it sliding off under its own weight.
Adding temporary body
The other approach is to make the fabric behave like something stiffer for the duration of cutting and stitching.
- Tissue paper pinned or basted underneath, cut through together, then torn away after stitching. Cheap and effective, if fiddly.
- Water soluble or tear away stabiliser under the seam line, removed afterwards. More controllable than tissue and less likely to leave fibres.
- Spray starch or sizing, applied in light coats and pressed dry, which stiffens the whole piece temporarily and washes out. Test first, since some starches mark silk.
- Freezer paper lightly pressed to the wrong side, which holds firmly and peels away cleanly.
Needle, thread and stitch settings
Fine fabrics need a fine sharp needle, typically a 60/8 or 70/10 microtex. A universal point pushes yarns aside in a tightly woven silk and leaves a visible mark; a sharp point pierces cleanly. Change it at the start of the project regardless of how much sewing the old one has done, because a slightly blunted needle snags fine filament yarns in a way it never would on quilting cotton.
Match thread to fabric weight, using a fine polyester or silk thread rather than a general purpose all rounder, and shorten the stitch to roughly 2 to 2.5 mm. Shorter stitches distribute the load over more penetration points, which matters because a fine fabric offers little resistance to a thread pulling through it.
Heat is a real consideration on synthetic sheers. Research measuring needle temperature during sewing found that the needle temperature rises abruptly in the first 10 to 13 seconds to above 130 degrees Celsius, with heat generated mainly by friction between the needle and the thread and between the needle and the fabric. On polyester chiffon that is enough to soften the polymer at the hole. Sewing slower on long seams genuinely helps.
Seam slippage, which is a distinct problem
Slippery fabrics fail at the seam in a specific way. Rather than the thread breaking or the cloth tearing, the yarns slide away from the stitch line and the seam opens into a ladder of gaps. ASTM D1683/D1683M, the standard test method for failure in sewn seams of woven fabrics, treats this explicitly, identifying that sewn seams in woven fabrics can fail by rupture, by slippage, or by a combination, and that seam engineering choices around sewing thread tex size, seam type, stitch type and stitch density determine which.
Fabric density is the underlying variable. Yarn count per unit length is measured by ASTM D3775, the standard test method for end (warp) and pick (filling) count of woven fabrics. Low count, smooth filament wovens have both fewer interlacing points holding yarns in place and lower friction between them, which is precisely the combination that produces slippage. This is why an enclosed seam is not just a tidiness choice on these fabrics but a structural one.
Finishes that suit the fabric
French seams are the standard answer. The raw edges are enclosed inside the seam itself, so nothing frays, nothing shows through a sheer fabric, and the double line of stitching resists slippage better than a single one. Sew wrong sides together with a narrow allowance, trim close, press, turn and sew again with right sides together to enclose the edge.
For hems, a narrow rolled hem, either machine rolled with a hemmer foot or hand rolled on the finest work, keeps weight and bulk out of the edge so it hangs rather than flares. Hang a bias cut or circular skirt for at least 24 hours before hemming, because the bias will drop and an evenly cut hem will not stay even.
Machine adjustments worth making
Reduce presser foot pressure if your machine allows it, since heavy pressure pushes fine fabric into the feed dogs and causes the puckered, wavy edge. Fit a straight stitch throat plate with a single small needle hole rather than a wide zigzag slot, which removes the main route by which fine fabric gets pulled into the machine at the start of a seam. Hold both thread tails firmly for the first few stitches.